
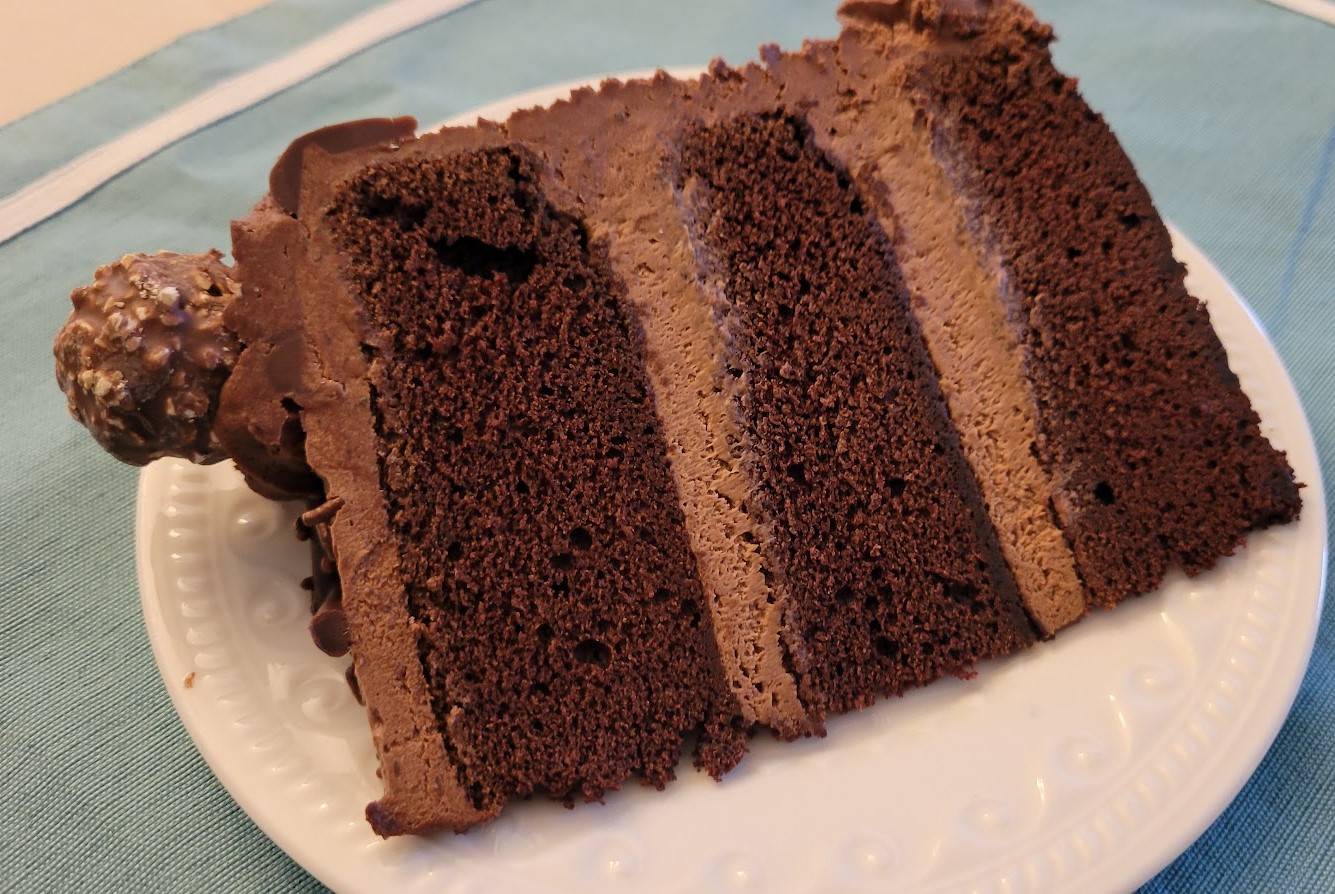
Get ready for chocolate overload. But you can never have too much chocolate, right? So it’s all good… VERY good.
This is the make-up cake I baked for Gray after he was so disappointed with the flavor of the Dreamsicle Cake, which he declared was “the worst flavor I’ve ever tasted.” :p
This is a mish-mosh of different cake recipe elements I found online, have used in the past, or modified. I baked this monster for Father’s Day 2024, and as we were leaving to go home, Gray ran alongside our car and yelled out, “Will you make the same chocolate cake next time?”
I’d say he liked it.
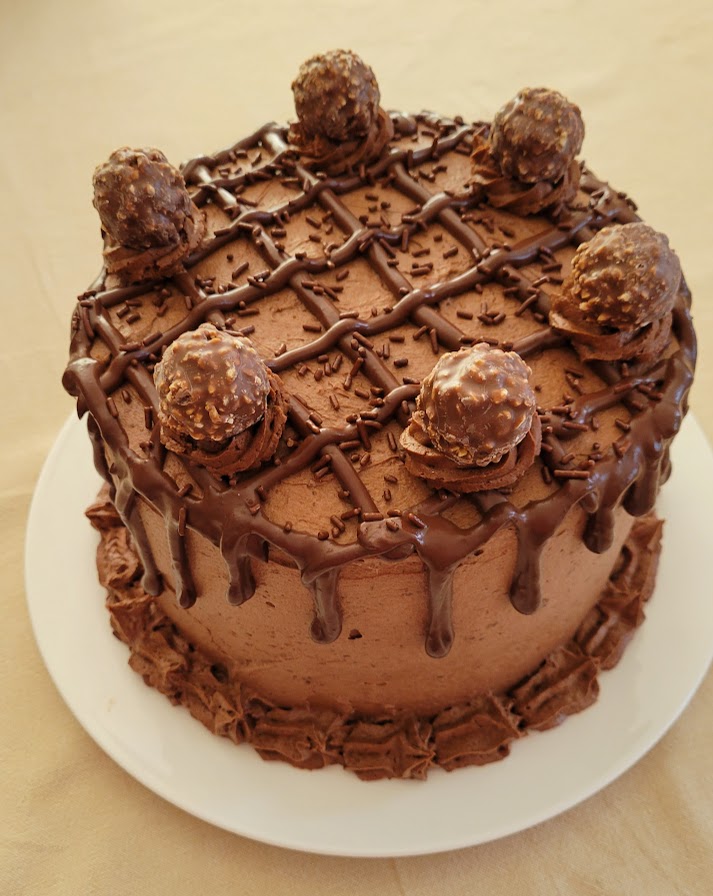
Triple Chocolate Truffle Cake
Chocolate decadence on overload. Make sure you have a glass of milk handy!
Ingredients
Cake Layers
- 2 c granulated sugar
- 2¾ c all-purpose flour
- 1 c unsweetened cocoa (lightly spoon into measuring cup, then sift directly into bowl)
- 1 tsp espresso powder (options, but gives richness)
- 2 tsp baking soda
- ¾ tsp salt
- 2 sticks (1 cup) unsalted butter, room temp
- ¼ c vegetable oil (canola is good)
- 4 large eggs, room temp
- 1 c whole milk
- 1 tsp vanilla extract
- 1 c hot coffee (instant or fresh brewed)
Chocolate Mousse Filling
- 1 3.4oz box chocolate instant pudding (the small box)
- 1 tsp espresso powder
- 2 c heavy cream or whipping cream
- ⅛ tsp salt
Chocolate Frosting
- 7½ tbsp all purpose flour
- 1½ c whole milk
- 1½ tsp vanilla
- 1½ c super fine sugar (baker's sugar) or granulated sugar (baker's sugar makes a smoother icing)
- 1 c unsweetened cocoa (lightly spoon into measuring cup, then sift directly into bowl)
- 1 tsp espresso powder
- ½ tsp salt
- 1½ c unsalted butter, cubed at room temp
Chocolate Ganache + Truffles
- 1 c heavy cream or whipping cream
- 2 tbsp unsalted butter
- 1 c bittersweet chocolate chips
- 1 tsp espresso powder
- 6-8 chocolate truffles of your choice (I used Ferrero Rocher)
- chocolate sprinkles (optional)
Instructions
Cake Layers
- Preheat oven to 350°. Prepare three 8" cake pans with baking spray or butter and flour. (If you have them, also use cake pan bottom liners for super easy removal.)
- In your mixing bowl, add all dry ingredients -- sugar, flour, cocoa, baking soda, baking powder, salt, and espresso powder. By hand with whisk or on low speed with whisk beater, whisk for approximately one minute to blend. (Be sure to change out whisk for paddle for the next step if you used the whisk beater in this step.)
- Add softened butter a few pieces at a time while the mixer is on slow speed. Keep adding the remaining butter and mix until the ingredients resemble coarse sand and the dry ingredients are moistened. Scrape the bottom and sides of the bowl before the next step.
- In a separate bowl, whisk the eggs, milk, oil, and vanilla until blended.
- This cake is made with the "Reverse Creaming Method," so follow these directions to the letter for best results. With the mixer on the lowest speed, SLOWLY add approximately one-half of the egg mixture to the dry ingredients until mostly blended. Increase the speed to medium and mix for 1½ minutes. Do not mix above medium speed. Stop and scrape the bottom and sides of the bowl. Add the remaining egg mixture in 2 pours, beating for 20 seconds after each pour. Again stop and scrape the sides and bottom of the bowl.
- Carefully and slowly add the cup of hot coffee on low speed and then mix on medium another 30 seconds until blended. The batter will be very runny, but this is how it is supposed to be.
- Pour the batter equally into the three prepared 8" pans. (This recipe makes about 9 cups of batter.) Bake at 350° for 25-35 minutes, or until the center of the cake springs back to touch and a toothpick comes out clean.
- Cool the layers for 10 minutes on a rack and then turn out of the pans onto the rack. The cake must be completely cooled before constructing your cake.
For the Chocolate Mousse Filling
- While you are making the cake layers, put a small to medium metal mixing bowl and beaters for your hand mixer in the refrigerator.
- Whisk the pudding mix, espresso powder, and salt in the mixing bowl until blended. Add the heavy cream/whipping cream.
- Beginning on low speed, mix until everything is well combined, and then gradually increase the mixer speed up to high until you have a nice, stiff mousse.
- Refrigerate until ready to use; should be completely chilled before assembling your cake.
Chocolate Frosting
- Cut up the butter and let it sit in the bowl until after you have completed the flour/milk/vanilla mixture. Set aside. (It should be at room temp when you are finished with the next two steps.)
- In a large lidded jar or container, use a mixer ball to shake the flour, milk and vanilla until smooth with no lumps.
- In a thick-bottomed sauce pan, pour in the flour/milk/vanilla mixture and stir constantly on low heat until the mixture thickens up completely. It will be very thick, like a sticky paste. Transfer to a small glass or metal bowl and put in the fridge to bring to room temp.
- Return to the mixing bowl with butter (which should now be at room temp), and cream together the butter, sugar, cocoa, espresso powder, and salt until light and fluffy, trying to get most of the graininess out of the mixture. Begin beating on low to avoid the cocoa from flying out of the bowl and then on to high for as long as necessary to make the mixture smooth.
- Add the completely cooled four mixture to the butter mixture and beat the living daylights out of it. If it looks separated, it's not beaten enough. Beat it on high speed until it resembles whipped cream.
- Refrigerate until ready to assemble your cake. There will be enough to frost the top and sides of the cake, as well as some minimal decorating.
Cake Assembly
- Place first cake layer on pedestal or cake base/plate. Pipe a ring/dam around the edge of the layer using a piping bag & tip or plastic bag with a corner tip cut away. Then apply the one-half mousse filling within the dam. Repeat with the next layer, and then place the final cake layer on top.
- Frost the cake top and sides with a crumb coating (just enough to cover, not too thick) and put in the refrigerator to set. (Now would be a good time to make the ganache*, below.) When crumb coating is set (about 15-30 minutes), follow up with the final coat of frosting, which should end up crumb free (yay!). Pipe decorative border at the bottom of the cake, if desired. Chill again.
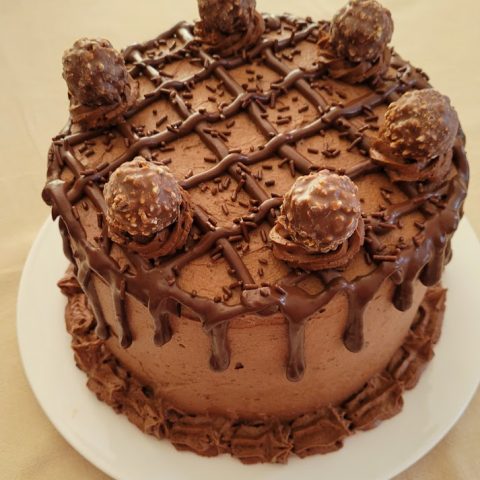
- Add your ganache lattice pattern on top (see tips below), add chocolate sprinkles while ganache is still moist to hold them in place. Pipe 6-8 frosting swirl beds for the truffles, then add a truffle in each frosting bed. Chill your cake until ready to serve.
*Chocolate Ganache
- While your crumb-coated cake is chilling, make the chocolate ganache for the lattice pattern and dripping on the sides.
- In a thick bottom sauce pan, add the cream and butter on low heat until the butter has melted and the cream is warm throughout.
- Add chocolate chips, espresso powder, butter, and salt. Stir constantly over very low heat until the chips have melted and the ingredients are thoroughly mixed and smooth. Funnel ganache into a squeeze bottle (or put in a zipped plastic bag) and let cool to room temperature.
- When your cake is chilled and ready for the ganache, use the squeeze bottle (⅛" opening) and squeeze the ganache in a lattice pattern on the cake top. The ganache must be at room temp for best results, or it will be too drippy. And the ganache can't be too chilled, or it won't drip properly and come out in blobs.
- Ganache drip tips: Start in the middle of the cake for your first lattice line and then equally move out on either side of the middle line to make your pattern. Turn the cake one-quarter, and add the cross lattice pattern. You can drip the pattern over the edge while doing this, or add the drips after you finish the pattern on top. If your drips are not flowing very well, zap your ganache 10 seconds at a time in the microwave until you get the right consistency. If the drips are too runny, your ganache needs to cool a bit longer. This might take some patience and practice to get it "just right," but it will taste equally as good if it's not.
Now that I’ve written this up, I’m thinking it should be called “Quadruple Chocolate Truffle Cake.”
0 comments on “Triple Chocolate Truffle Cake”Add yours →